DRAWING
Some ideas to get you going
Some ideas to get you going
Re-visit some of the Right Side of the Brain exercises.
1 -Vase Face drawing
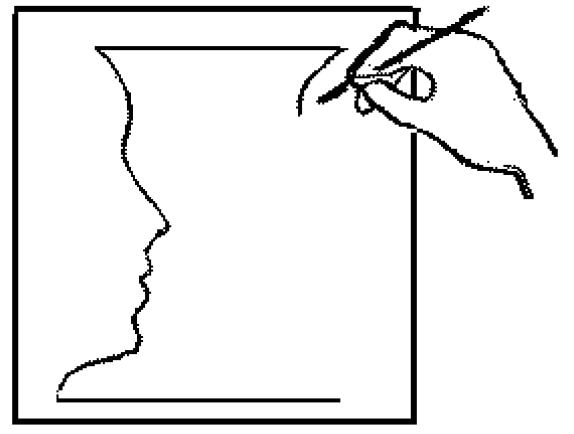
1. Draw a profile of a person’s head on the left side of the paper, facing toward the centre.
2. Next, draw horizontal lines at the top and bottom of your profile, forming top and bottom of the vase.
3. Now go back over your drawing of the first profile with your pencil. As the pencil moves over the features, name them to yourself: forehead, nose, upper lip, lower lip, chin, neck.
Repeat this step at least once. This is an L-mode task: naming symbolic shapes.
4. Next, starting at the top, draw the profile in reverse. By doing this you will complete the vase. The second profile should be a reversal of the first in order for the vase to be symmetrical. Watch for the faint signals from your brain that you are shifting modes of information processing. You may experience a sense of mental conflict at some point in the drawing of the second profile. Observe this, and how you solve the problem. You will find that you are doing the second profile differently. This is right- hemisphere drawing. Avoid naming the shapes (‘forehead’ etc).
2- Drawing Negative Spaces
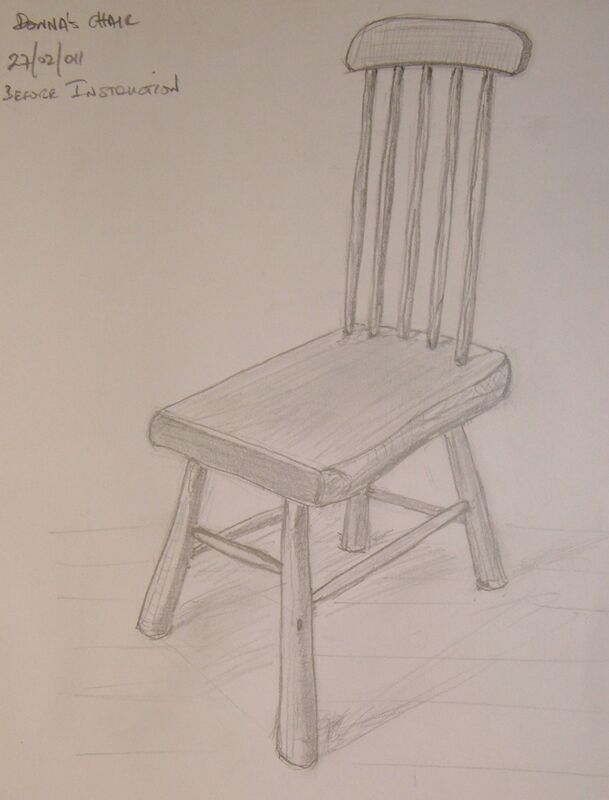
When a person just beginning in drawing tries to draw a chair, that person knows too much, in an L-mode sense, about chairs. For example, seats have to be big enough to hold a person; all four chair legs are usually all the same length; chair legs sit on a flat surface, and so forth. This knowledge does not help, and in fact can greatly hinder, drawing a chair. The reason is that, when seen from different angles, the visual information may not conform to what we know. Visually—that is, as seen on the plane—a chair seat may appear as a narrow strip, not nearly wide enough to sit on. The legs may appear to be all of different lengths. The curve of the back of a chair may appear to be entirely different from what we know it to be
What are we to do?
An answer: Don't draw the chair at all! Instead, draw the spaces of the chair.
What are we to do?
An answer: Don't draw the chair at all! Instead, draw the spaces of the chair.
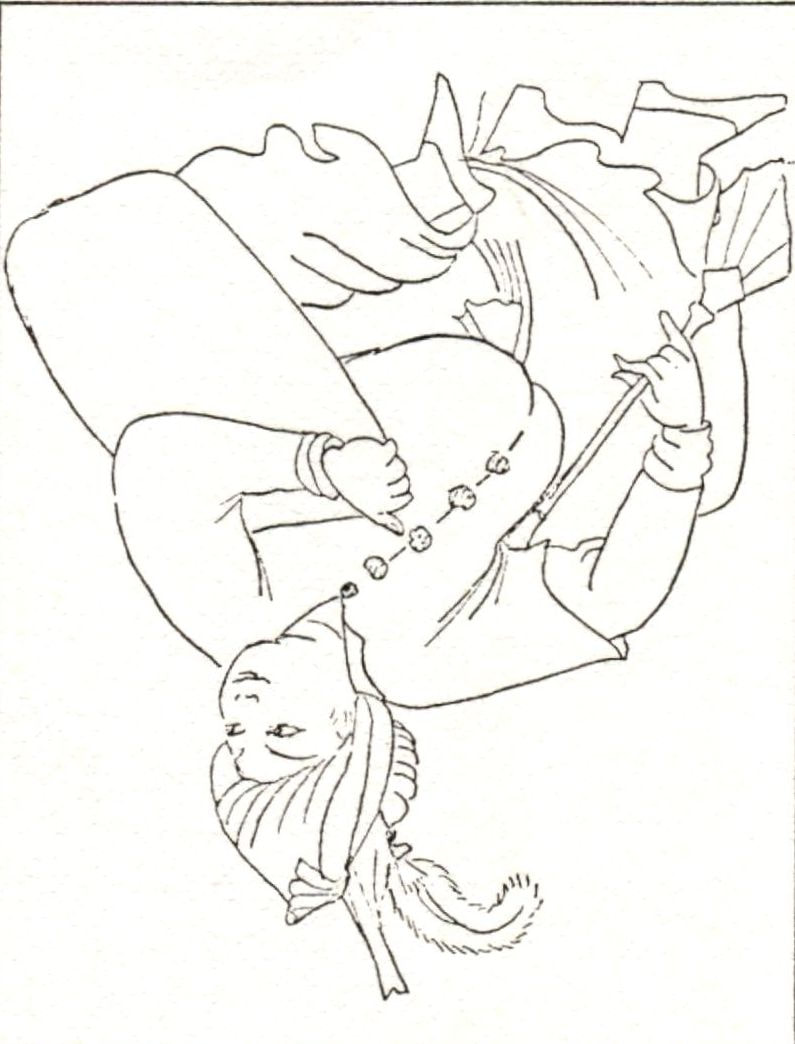
3- Upside Down Drawing
Familiar things do not look the same upside down. We automatically assign a top, bottom,
and sides to the things we perceive, and we expect to see things oriented in the usual way -
that is, the right side up. For, in upright orientation, we can recognise familiar things, name
them, and categorise them by matching what we see with our stored memories and concepts.
When an image is upside down, the visual cues don't match. The message is strange, and the
brain becomes confused. We see the shapes and the areas of light and shadow, We don't
particularly object to looking at upside-down images unless we are called on to name the
image. Then the task becomes exasperating.
The exercise of upside-down drawing is to take a line drawing, place it upside down and copy
it. You will be copying an upside- down image and your drawing, therefore, will be done also
upside down. In other words, you will copy the drawing just as you see it. Do not turn the
original or your drawing around until you are finished. You will probably be pleasantly
surprised at your results.
The benefit of this exercise is that it forces you to observe shapes, lines and their
relationships rather than naming features.
Each time you draw, try consciously to experience the R-mode shift, so that you become familiar with how it feels to be in that mode.
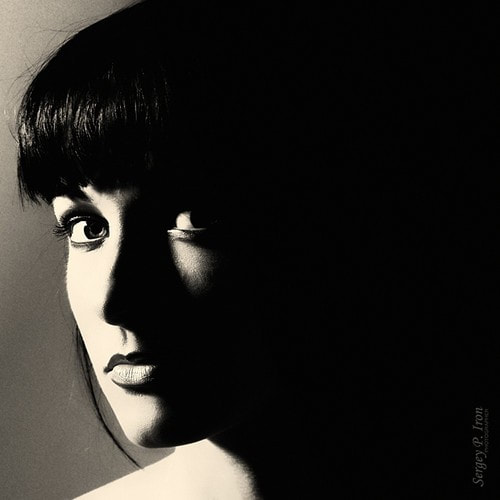
4 - Light and Shade